

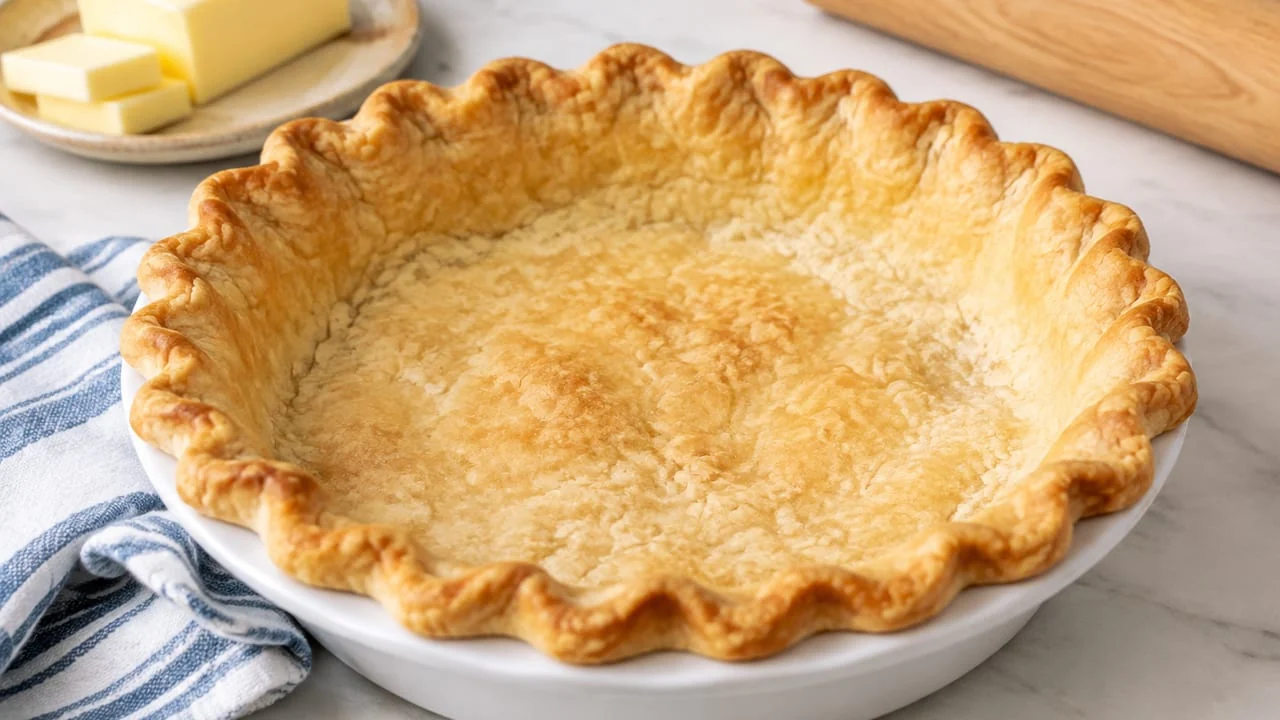
Follow these super easy instructions for a butter, flaky, delicious homemade pie crust — seriously, this is the easiest all butter pie crust recipe you’ll ever make, and I’m about to prove it to you.
You guys. I finally did it!!
Me. The anti-homemade-pie-crust-maker. I finally, after 6 years of making desserts day in and day out and posting recipe after recipe… I FINALLY have an all-butter pie crust recipe that I feel confident enough in to share with you. This is officially my new go-to pie dough recipe, and I think it’s about to become yours too.
You know me. I don’t do complicated or time consuming or ridiculously tedious when it comes to the kitchen. Or anything else for that matter! So when I tell you that this all-butter pie crust is EASY, you can believe me. Cross my heart. This is genuinely the easiest all butter pie crust recipe out there, with simple ingredients you probably already have sitting in your kitchen right now.
Why This Is The Easiest All Butter Pie Crust Recipe You’ll Ever Make
Let’s talk about why this butter pie crust recipe earns its name. No weird ingredients, no vegetable shortening required (though you totally could swap some in if that’s your thing), and no fancy techniques that require a culinary degree. Just cold butter, dry ingredients, a little ice water, and a whole lot of love. The flaky layers you get from an all-butter crust just can’t be beat — butter gives you that rich flavor and incredibly flaky texture that shortening alone just doesn’t deliver. This is truly a simple recipe, and once you make it, you’ll wonder why you ever bought store-bought crust in the first place.
Whether you’re making a single pie crust for a custard pie or a double-crust pie for classic fruit pies, this method works every single time. I’ve used this same buttery pie crust for everything from apple pie to blackberry crumb pie, and it never lets me down.
Tools You Need For This Butter Pie Dough
Now, before we get started there are three tools you MUST HAVE before making this recipe. They are:
- a KitchenAid Stand mixer (or similar) with the paddle attachment OR a food processor
- a gallon-sized zip top bag
On that last item, you could maybe squeak by with a piece of parchment paper. But if pie crust-making isn’t your thing to start with, then just make it easier on yourself and get a silicone baking mat. I personally use a Silpat or Roul’Pat, but I’ve seen lots of other brand mats that I think would work just as well. You’ll also want a good rolling pin on hand — nothing fancy, just something sturdy that feels comfortable in your hands.
Are you ready to get started? I’ve got lots of step-by-step instructions and even a video lined up for you today! Because my goal is to make this easy for you. Easy peasy lemon squeezy y’all. If I can make an all butter pie crust from scratch, anybody can!
Mixing The Flour Mixture And Cold Butter
Here we go…
I like to use a stand mixer to mix the dough, but I know a lot of people prefer a food processor for crusts, which is totally fine. To me, it’s just easier to throw all the ingredients in the stand mixer that I already have sitting on my counter. But that’s your call! If you’d rather go old school, a pastry cutter or pastry blender works great too — just cut the cold butter into the flour mixture until it looks like coarse crumbs with pea-size pieces throughout.
Start out with cold butter — unsalted butter is what I always reach for, since it lets you control the salt — that has been cut into pieces, about 1-inch cubes to start. Toss that into the mixer bowl (or large bowl if you’re working by hand) with the flour and beat them together at a low-medium speed until you have something that resembles crumbs with visible bits of butter still showing. That’s totally normal and exactly what you want! Those small bits of butter are what create those gorgeous flaky layers once the pie bakes. Add the kosher salt, the vinegar, and the ice water (cold water works too, just make sure it’s really cold), and continue to beat until, eventually, a dough forms. The mixture will look like shaggy dough for a few minutes, but that’s okay. Trust the recipe! Keep mixing and it will come together, I promise!
Be careful not to add too much water! A little water goes a long way, and less water is always better than too much — you want the dough to just barely come together, not get sticky or wet. If you add too much water, your crust will turn out tough instead of tender and flaky, and nobody wants that.
Shaping Your Butter Pie Dough Into Discs
Divide the dough into two and place each piece of dough into a gallon-size plastic bag. Twist the top of the bag until all the air is out and the plastic is tight around the dough. Now press the dough into a disc in the bag. I like using the bag, because it contains the dough so nicely and helps form it into that perfectly round disc while preventing breaks and cracks.
This step will make it SO much easier to press and roll out in a minute. Pop the discs in the fridge for at least 30 minutes before you move on — chilled dough rolls out so much more easily than dough that’s warmed up to room temperature, and it helps keep those small bits of butter intact for maximum flakiness.
Remove the dough from the bag and carefully continue to press it out with your hands on the silicone baking mat, which will act as your work surface for this whole process. Continually press and shape around the edges of the disc to seal up cracks as they occur. Again, this will make it so much easier when it comes to using the rolling pin in the next step, because we are preventing the cracks (which are my nemesis when it comes to pie-making).
Pressing out the dough as much as possible with your hands (as opposed to the rolling pin) goes a long way in keeping the dough intact. If you’d rather skip rolling altogether, I’ve also got a press in the pan pie crust recipe that’s basically foolproof.
Rolling Out Your Flaky Pie Crust Recipe
Finally, bust out that rolling pin! Make sure you’re working on a lightly floured surface so nothing sticks.
Gently, gently, gently! Roll out the dough. Love the dough. Be kind to the dough. Otherwise… you’ll crack it and be so sad!
Now here comes my special trick. Once you’ve made sure that the dough has been rolled out to be a little bigger than the size of your pie dish…
…use the baking mat to roll the dough around your rolling pin!
I know everyone uses the rolling pin trick to roll up their dough, but I’ve always struggled with my dough cracking and tearing as I did it. That is, until I discovered this method. Keeping the silicone mat against the dough for as long as possible will help prevent tearing and cracking until you’ve got the dough securely onto the rolling pin for transferring to the pie plate. Cook’s Illustrated swears by chilling dough between steps too, and honestly, they’re onto something — a cold butter pie dough is a cooperative butter pie dough.
Like so.
Voila! Trim and crimp the edges, and you’re all done with the easiest all-butter pie crust of all time. Fill it with your favorite stuff (I prefer this chocolate pecan pie) and wow all of your Thanksgiving guests with this effortlessly delicious, buttery, thick homemade pie crust.
Blind Baking: For When Your Pie Needs A Fully Baked Crust
Okay, let’s talk blind baking for a second, because this trips up even seasoned bakers! If you’re making a custard pie, a cream pie, or anything with a wet filling that doesn’t need to bake very long (or at all), you’ll want to blind bake your crust first. That just means pre-baking the bottom crust before you add the filling, so you don’t end up with a soggy bottom of the crust situation. Nobody wants that!
To blind bake, press your dough into your 9-inch pie dish, prick the bottom crust all over with a fork, then line it with a piece of parchment paper or aluminum foil and fill it with dried beans or pie weights. Use pie weights (or the beans) to keep the crust from puffing up and losing its shape while it bakes. Bake at 375°F until the edges are golden brown, then remove the weights and parchment and bake a few more minutes for a fully baked crust that’s totally ready for a creamy filling like the one in my chocolate cream pie.
Single Crust Pie Vs. Double Crust Pies
This butter pie dough recipe makes enough for a double-crust pie, but it’s just as easy to use for a single crust pie if that’s all you need. For single crust pie recipes like pumpkin pie or a custard pie, simply freeze the second disc of dough for another day — it keeps beautifully in the freezer for a couple months, so you’ll always have a buttery pie crust on standby.
Double crust pies, on the other hand, are perfect for all your classic fruit pies — think apple, blueberry pie, or a juicy peach situation. The top crust traps in all that bubbling, delicious filling while the bottom crust gets perfectly golden brown. This method of this dough works beautifully whether you’re making sweet pies or savory pies, like a cozy chicken pot pie on a chilly night. Honestly, once you’ve got this flaky pie crust recipe down, the pie recipes you can make are basically endless.
Tips For The Best Pies Every Single Time
A few last things I’ve learned after way too many pie disasters over the years! First, always start with really cold butter and ice water — if your kitchen is warm, pop your dry ingredients and cold cubed butter in the freezer for 10 minutes before you start. Second, don’t overwork the dough; the second you see those pea-size pieces of butter throughout, stop mixing. Overmixing is the number one way to lose that flaky texture we’re all chasing.
Also, resist the urge to add too much water just because the dough looks a little shaggy at first — it’ll come together, I promise. And if you’re ever unsure whether your homemade pie dough is ready to bake fillings in, just remember: this recipe is meant to be a starting point. Once you get the hang of it, you’ll be tweaking and perfecting your own homemade pie crust in no time, and it’ll become the easy way you make every pie from here on out.
Easy All Butter Pie Crust
Follow these super easy instructions for a butter, flaky, delicious homemade pie crust.
Ingredients
- 1 cup salted butter, chilled and cubed
- 2 1/2 cups all-purpose flour
- 1/2 tsp salt
- 1 tbsp vinegar
- 7 tbsp ice water
Instructions
- Beat the butter in the stand mixer with the paddle attachment for about 30 seconds.
- Add the flour and mix until it looks like crumbs.
- With the mixer still running, add the vinegar and the cold water.
- Continue mixing until dough forms.
- Divide dough into two parts. Place each piece of dough in a plastic bag. Press the dough into a disc inside the bag.
- Remove from bag and press out with hands onto silicone baking mat.
- Use a rolling pin to gently roll the dough out to be a little larger than a pie dish in circumference.
- Use baking mat to gently roll dough onto the rolling pin to transfer to the pie dish.
- Press crust dough into the dish, trim, and fill for baking.