

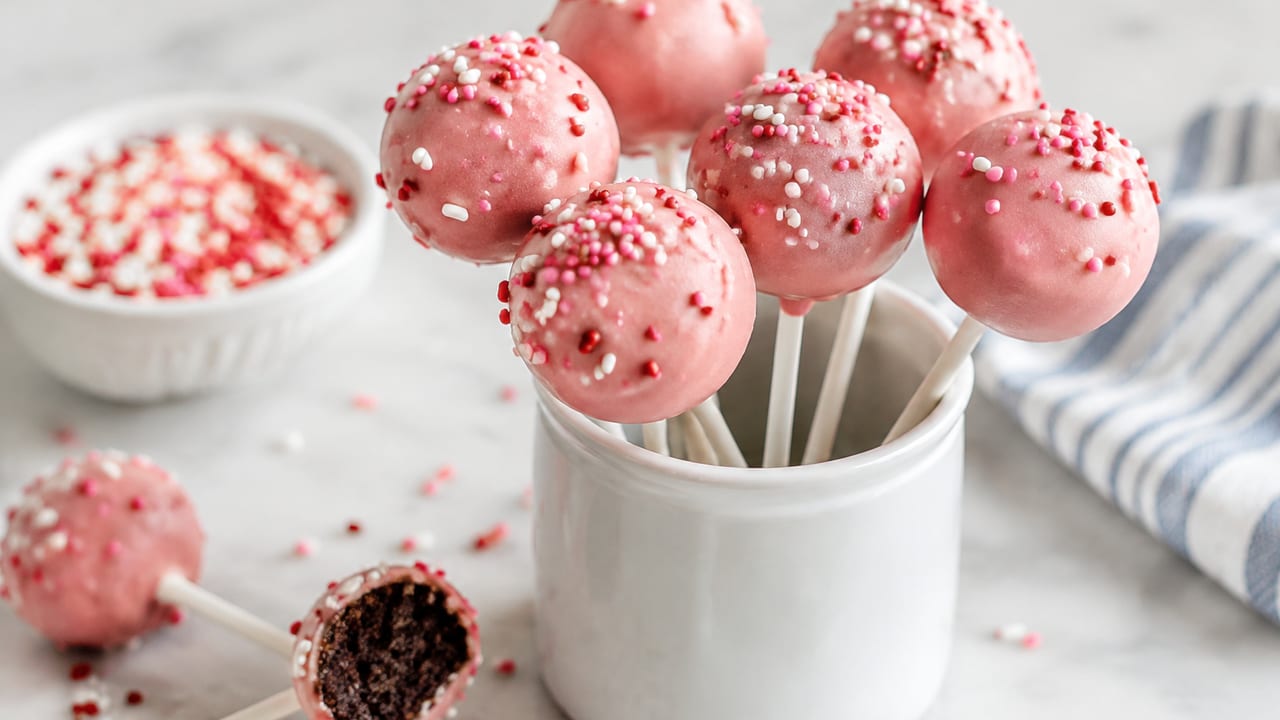
Okay, so can we talk about my borderline unhealthy obsession with that little pink and white ball of joy sitting in the Starbucks pastry case? Yep, I’m talking about the famous birthday cake pop, and today I’m handing you my absolute favorite starbucks cake pop recipe so you can make these little guys at home without driving through for the fifth time this week (no judgment, I’ve been there). This copycat version is fudgy, sweet, ah-mazing, and honestly tastes just like the real thing — maybe even better because you made it with your own two hands. Grab your apron, friends, because we’re making magic happen in cake ball form.
Why You Need This Starbucks Cake Pop Recipe In Your Life
Listen, I love a fancy dessert as much as the next person, but sometimes you just want bite-sized treats that feel a little indulgent without requiring a culinary degree. That’s exactly what this starbucks cake pop recipe delivers. It’s got simple ingredients, it comes together with basic kitchen tools, and the payoff is a sweet treat that looks like it came straight from the coffee shop counter. Be still my heart, you guys — these things are just so cute.
Whatever the occasion, from birthday parties to baby showers to a random Tuesday where your sweet tooth is simply screaming, this copycat recipe has your back. And if you’re already a fan of recreating coffeehouse favorites at home, you’ll probably also love my Starbucks Pink Drink recipe and the Vanilla Bean Frappuccino recipe for the full coffee shop experience right in your kitchen.
What Makes The Starbucks Birthday Cake Pop So Irresistible
There’s something about the starbucks birthday cake pop that just hits different. It’s got that classic vanilla cake base, it’s dunked in pink candy coating, and it’s finished off with a sprinkle of white nonpareils that makes it look like confetti exploded in the best possible way. It’s basically a party in your palm, and that’s exactly why I wanted to figure out how to recreate it.
The magic really is in the balance of flavors. The cake itself is moist and a little dense (in the best way), the frosting binds everything into these perfect little cake pop balls, and the chocolate coating adds that satisfying crackly shell you bite through to get to the good stuff. It’s genuinely one of those irresistible Starbucks treats that tastes way more complicated than it actually is to make. Once you nail the entire process at home, you’ll wonder why you ever paid coffee shop prices for something this simple to whip up yourself.
Simple Ingredients For Homemade Cake Pops
One of my favorite things about this easy cake pop recipe is just how short the ingredient list is. You really don’t need anything fancy here, just a box cake mix (yep, we’re keeping it easy and fool proof), some vanilla buttercream frosting, pink candy melts for that signature coating, and white sprinkles to finish things off. You can absolutely use a chocolate cake mix if you want to switch things up and make chocolate cake pops instead of vanilla cake pops, and both are honestly amazing.
You’ll also want some coconut oil on hand, because it thins out melted chocolate and melted candy melts to give you that smooth finish everyone wants when dipping. A splash of vanilla extract in your cake batter never hurts either, it just deepens that homey, bakery flavor we’re going for. Simple ingredients, big payoff, that’s the name of the game with cake mixes turned into something special.
How To Make The Cake Base And Cake Crumbs
First things first, you’re going to bake your cake according to the directions on the box, using whatever cake pan you’ve got on hand. Once your baked cake comes out of the oven, let the cake cools completely before you do anything else — this part matters more than you’d think, because a hot cake will turn your whole bowl into a gummy mess. Patience, friends. I know, I know.
Once your cooled cake is ready, crumble it up into fine cake crumbs in a large mixing bowl, using your hands or the paddle attachment on a stand mixer set to low speed. You want it to look like sand, no big chunks allowed. Then you’ll mix in your frosting until everything comes together into a dough-like consistency that holds its shape when rolled. This is honestly such a great way to use up extra cake scraps too, if you’ve got some sitting around from another baking project like my raspberry pound cake.
Rolling And Chilling The Cake Pop Balls
Now comes the fun (and slightly messy) part! Using a small cookie scoop, portion out your cake mixture and roll each piece between the palm of your hand until you get a smooth ball. Consistency is key here for the best cake pops, so try to keep them all roughly the same size. Line them up on a baking sheet lined with parchment paper as you go.
Once all your cake pop balls are rolled, pop that cookie sheet into the fridge or freezer for a bit to firm up. This step is non-negotiable, trust me — chilled cake balls hold their shape so much better when it’s time to dip, and you’ll have way less heartbreak with cracking or sliding off the stick. As a general rule, thirty minutes in the freezer or an hour in the fridge does the trick perfectly. While you wait, this is a great time to melt your chocolate coating and get your dipping station set up with a styrofoam block or cardboard box ready to hold your cake pop sticks upright.
Dipping, Decorating, And Storing Your Copycat Starbucks Cake Pops Recipe
Time for the glamour shot moment! Melt your pink candy melts in a microwave-safe bowl in 30-second intervals, stirring between each one, until smooth. You can also use white chocolate or almond bark if that’s what you’ve got tucked in the pantry. Dip the tip of each lollipop stick into the melted candy coating first, then insert it into your chilled cake pop balls about halfway — this little trick is what keeps your first cake pop (and every one after it) from sliding right off.
Dip each cake ball into the pink coating, tapping off excess chocolate gently against the side of the cup for best results, then roll in white sprinkles before the coating sets. Stand your dipped cake pops upright in your styrofoam block to dry completely. Once set, store them in an airtight container at room temperature for a couple days, or in the fridge for longer storage. And there you have it, your very own copycat Starbucks cake pops recipe, ready for special celebrations, cozy nights in, or honestly just because you deserve something ah-mazing. If you’re on a copycat kick, don’t miss my Starbucks Egg Bites recipe and Starbucks Pumpkin Muffin recipe too — see the bottom of this post… just kidding, go check them out now, you won’t regret it!
Copycat Starbucks Cake Pops Recipe
Yield:
24 Servings
45 minutes:
45 minutes
40 minutes:
40 minutes
1 hour:
1 hour
Total Time:
2 hours 25 minutes
There’s something irresistible about those perfectly round, candy-coated cake pops in the Starbucks display case, and the good news is they’re surprisingly easy to recreate at home. This copycat recipe yields soft, moist cake pops with a crisp candy shell for a fraction of the coffee shop price.
Ingredients
For the cake
- 1 box (15.25 oz) vanilla or chocolate cake mix, plus ingredients called for on the box (typically eggs, oil, water)
For the filling and coating
- 3/4 to 1 cup vanilla frosting (store-bought or homemade)
- 16 oz candy melts (pink, white, or your choice of color)
- 2 tablespoons vegetable shortening or coconut oil (to thin the candy melts, if needed)
- Sprinkles, mini chocolate chips, or crushed cookies for decorating
Equipment
- 24 cake pop sticks (lollipop sticks)
- Styrofoam block or cake pop stand (for drying)
Instructions
- Prepare and bake the cake mix according to the package instructions, using a 9×13-inch pan. Let it cool completely.
- Once cooled, crumble the cake into fine crumbs in a large mixing bowl, breaking up any large chunks with your hands or a fork.
- Add 3/4 cup of frosting to the crumbs and mix until the mixture holds together when pressed, like play dough. Add more frosting a tablespoon at a time if it feels too dry, being careful not to over-moisten.
- Roll the mixture into 24 balls, about 1 to 1.5 tablespoons each. Place them on a parchment-lined baking sheet and chill in the freezer for 15 minutes, or in the fridge for 1 hour, until firm.
- Melt the candy melts according to package instructions, either in the microwave in 30-second intervals, stirring between each, or using a double boiler. Stir in shortening or coconut oil if needed for a smooth, pourable consistency.
- Dip the tip of a cake pop stick into the melted candy, then insert it about halfway into a chilled cake ball. Repeat for all the pops and return them to the freezer for 5-10 minutes.
- Working one at a time, dip each cake ball into the melted candy coating, fully submerging it. Gently tap the stick against the edge of the bowl to let excess coating drip off, rotating slowly for an even coat.
- While the coating is still wet, immediately add sprinkles or your choice of toppings.
- Stand the finished cake pops upright in a styrofoam block or cake pop stand to set and dry completely, about 20-30 minutes.
- Serve and enjoy. Store any leftovers in an airtight container at room temperature for up to 3 days, or refrigerate for up to a week.
Notes
If your cake balls keep sliding off the stick, your cake-to-frosting ratio might be too wet — chill them longer and add less frosting next time. Always make sure your candy coating isn’t too hot, or it can cause the cake pop to crack as it cools.