

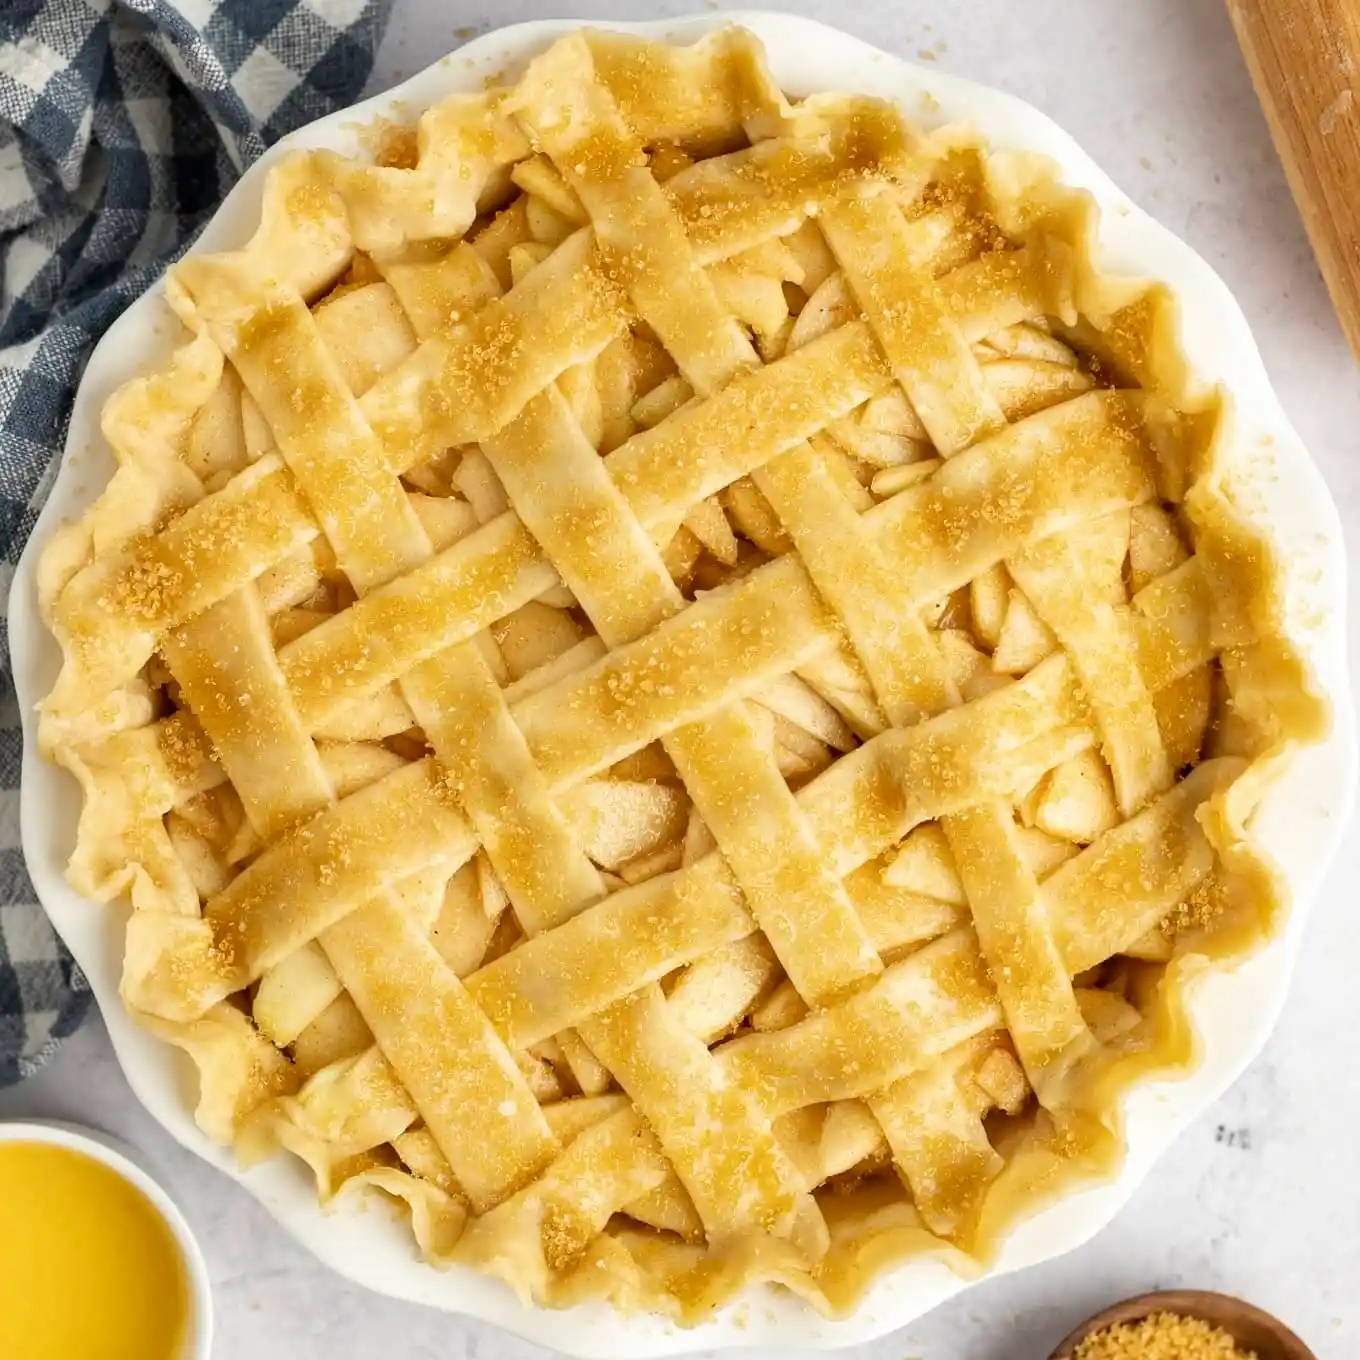
Think making a lattice pie crust is complicated and time consuming? Think again! This straightforward method for weaving a lattice pie crust is an easy way to elevate any pie recipe.
*Originally published November 2018. Pictures and post updated November 2026*
The thought of trying to weave a lattice topping on a pie used to seem so intimidating to me. It wasn’t until I actually tried it myself a few times that I realized it’s actually not very difficult at all.
After a little trial and error, I found a technique that makes weaving a lattice pie crust topping extremely easy and it only takes a few minutes. If you can roll out some dough, cut it into strips, and follow a few simple steps, then you can easily throw this together!
With Thanksgiving right around the corner, this is also a perfect way to add a beautiful touch to your pie without much effort. Everyone will think it took a lot of work, but the fact that it’s actually really easy can be our little secret!
What You Need
Here’s what I suggest having on hand to make the process much smoother:
- All-Purpose Flour: You’ll want to dust your work surface and the pie crust with a little flour while rolling out the dough. This will prevent anything from sticking!
- Pie Crust: You can use store-bought or homemade pie crusts (I personally prefer my homemade recipe!).
- Rolling Pin: You don’t need anything fancy, I use one similar to this rolling pin. If you find that rolling pie crust to an even thickness is a little difficult, an adjustable rolling pin may be helpful for you.
- Pizza Cutter or Knife: I personally prefer to use a pizza cutter to cut the pie crust into strips, but a sharp knife works too. If you want the strips to be a little more decorative, you can use a fluted pastry wheel instead.
- Pie Plates: I usually stick with one that’s 9 to 9.5 inches for my pies. I really love these anchor pie plates.
- Pie Filling: Feel free to use your favorite pie filling for this recipe. For this tutorial I used my apple pie recipe, but my homemade cherry pie is delicious too!
- Egg Wash + Coarse Sugar: I highly recommend brushing the lattice topping with an egg wash (an egg and a little milk) so it turns a beautiful golden brown color in the oven. The coarse sugar is optional, but it adds a little extra sweetness and crunch.
- Pastry Brush: This is used to brush the egg wash onto your pie crust. I prefer to use a silicone pastry brush because they’re easier to clean and I can just toss it in my dishwasher when I’m done.
How To Make A Lattice Pie Crust
- Roll out the bottom pie crust: I usually roll mine out until it’s about ⅛-inch thick. Place it in your pie dish, trim off any excess dough, then fill it with your favorite pie filling.
- Cut the top crust into strips: Roll out the second pie crust to the same thickness, then cut it into 10 equal strips that are roughly ¾-inch wide. You also want the strips to be slightly longer than your pie dish.
Note: If you need a little help with rolling out pie crust and transferring it to your pie dish, you can see exactly how I do it in my pumpkin pie video.
- Place five strips onto the pie: These strips should be placed vertically over the pie filling and spaced an equal distance apart. Think of these pie strips as “1, 2, 3, 4, and 5” in your head.
- Fold back pie strips 1, 3, and 5: Place one pie strip horizontally across the middle of the pie. This piece will overlap with pie strips 2 and 4. Fold strips 1, 3, and 5 back down.
- Fold back pie strips 2 and 4: I usually work my way up the pie first, but you can go either way. Place another strip horizontally over the pie. Fold strips 2 and 4 back down.
- Fold back pie strips 1, 3, and 5 again: Lay another horizontal strip at the top of the pie before folding strips 1, 3, and 5 back to their original positions. You’re over halfway done now!
- Fold back strips 2 and 4 on the bottom half of the pie: Place a horizontal strip over the pie, then fold strips 2 and 4 back down.
- Fold back strips 1, 3, and 5 on the bottom half of the pie: Place the final horizontal strip over the bottom of the pie. Return strips 1, 3, and 5 to their original positions.
- Decorate the edges: Make sure to trim off any excess pie dough first. From there, you can flute, crimp, or braid the edges however you want. I usually just use my knuckle and fingers to pinch the edge together and make it look a little more decorative.
- Brush with an egg wash before baking: Just whisk one egg together with a tablespoon of milk and brush it on with a pastry brush. I also like to sprinkle the top of my crust with some coarse sugar, but this is optional. Then, just bake your pie as instructed in your recipe!
How To Prep Ahead Of Time
With most pie recipes (especially fruit pies) it won’t work well to try to prep your pie in advance. If you place the filling on top of the bottom crust and let it sit, it will become soggy and not bake correctly.
You can roll out each pie crust, place one into your pie dish, then cut the second one into strips for the lattice topping. You can store the bottom crust in the pie dish and place the lattice strips on a parchment-lined baking sheet. Just make sure to cover both tightly with plastic wrap (so they don’t dry out!) and keep them refrigerated until you’re ready to assemble the pie.
Then when you’re ready to make the pie, just fill it with your pie filling, add the lattice topping, and bake!
How Can I Keep My Pie Crust From Burning?
If the edges of your pie crust start to brown too much before they’re done, you can cover them with a pie crust shield. If the lattice topping starts to brown too much before the filling is done, just place a piece of foil over the top.
Told you it was easy, right?
If you try this for the holidays, don’t forget to leave a comment below to let me know how your pie turned out. Happy Baking!
How To Make A Lattice Pie Crust
Prep Time: 25 minutes
Total Time: 25 minutes
Think making a lattice pie crust is complicated and time consuming? Think again! This straightforward method for weaving a lattice pie crust is an easy way to elevate any pie recipe.
Servings: 1 pie
Cook ModePrevent your screen from going dark
-
Roll out one pie crust until it’s about 12 to 13 inches in diameter and ⅛-inch thick, then carefully place it into the pie dish. If needed, trim off any excess dough. Scoop your pie filling into the pie crust and set aside.
all-purpose flour,2 pie crusts,coarse sugar
-
Roll out the other pie crust to the same thickness and cut it into 10 equal size strips that are about ¾-inch wide and a little longer than your pie dish. You can cut the strips a little bit wider, but keep in mind that this process may not work as well if you cut them too wide.
-
Equally space five of the strips vertically on top of the prepared pie. Then, think of these five strips as numbers – 1, 2, 3, 4, and 5.
-
Fold back strips 1, 3, and 5 and place one strip horizontally across the middle of the pie. I like to start in the middle because it helps to make sure that the strips are evenly spaced. Fold strips 1, 3, and 5 back down. Working your way up, fold back strips 2 and 4 and place another strip horizontally across the pie above the middle strip. Fold strips 2 and 4 back down, then fold back 1, 3, and 5 and add one more piece of dough horizontally across the top of pie. Fold them back down.
-
Once you’ve completed the top half of the pie, repeat the same process again with the remaining lower half. Fold back strips 2 and 4, place another strip horizontally across the pie below the middle strip. Then, fold them back down. Finally, fold back strips 1, 3, and 5, put your final strip of dough horizontally across the bottom of the pie, then fold them back down.
-
Cut off any excess dough, then decorate the edges of your pie crust, making sure to pinch and seal the bottom pie crust and lattice crust together. For an easier option, you can trim off the excess dough and use a fork to decorate the edges and to help press the lattice topping into the edges of the pie crust.
-
Brush the pie crust with an egg wash (this is optional, but it will help it brown better) and sprinkle it with a little coarse sugar. Bake according to your recipe.
egg wash,1 batch homemade pie filling
More Pie Crust Tutorials to Try!