

This post may contain affiliate links. Read our disclosure policy.
Tessa’s Recipe Rundown
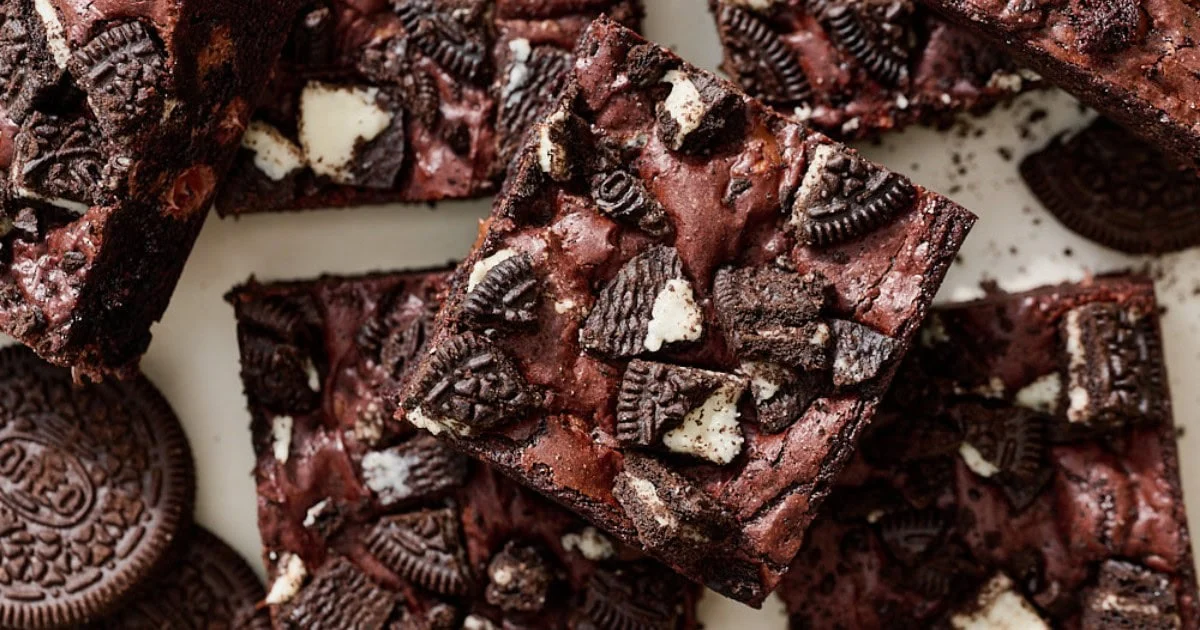
Taste: Like an Oreo, but in brownie form!
Texture: Fudgy and chewy with perfectly crunchy bites of Oreo throughout.
Ease: Just 1 bowl with no special equipment or lengthy steps required!
Why you’ll love this recipe: A simple twist on the classic that your whole family will adore.
- Tessa’s Recipe Rundown
- Key Recipe Ingredients
- Tessa’s Tips
These Oreo Brownies were inspired by another recipe I recently published: Chocolate Cookies & Cream Cookies.
The trick to both that recipe and this brownie recipe (besides folding in chopped Oreo cookies) is to add a small amount of black cocoa along with the Dutch-process cocoa powder.
The result is an out-of-this-world fudgy, chocolatey brownie with a perfect amount of Oreo flavor that’s ready in under 1 hour.
Key Recipe Ingredients
Butter and Oil: The butter lends flavor, while the oil helps create that moist and chewy box-mix texture that keeps the brownies soft for days. Use any neutral liquid oil you prefer.
Dutch-Process Cocoa Powder: This is my preference for most brownies. I find it provides a smooth and rich chocolate flavor, and because it tends to have double the cocoa fat as most natural cocoa powders, creating a rich, fudgy, moist texture.
Black Cocoa: This is what Oreos are made from, but it doesn’t actually offer much chocolate flavor. Adding a small amount in addition to the Dutch-process helps bolster the Oreo notes without sacrificing the chocolate flavor.
Cornstarch: A small amount helps tenderize the batter to create a soft and chewy texture. I also find it helps develop that shiny crust on top. If you don’t have it, you can omit it.
Chocolate Chips: I like semisweet chips in this recipe. You can use white chocolate chips if you prefer. Either way, I don’t recommend omitting because they help to create taller brownies with a shinier crust on top.
Oreos (Chocolate Sandwich Cookies): The star ingredient! Don’t chop them so finely you end up with Oreo dust and no contrast of texture. But also don’t chop them so large that the brownies are hard to cut! And keep the filling intact.
Tessa’s Tips
- Use a light-colored metal pan for the most even baking. If using glass or ceramic, you will need to increase the baking time.
- Whisk the eggs vigorously for the full minute to encourage a shiny top.
- Measure flour accurately (spoon & level, or better yet, by weight) to avoid dry or cakey brownies.
- Cool completely before cutting for clean squares and a chewier texture.
- For extra neat slices and a fudgier texture, chill the brownies for 30 minutes before serving.
- Use a sharp knife and wipe it clean between cuts.
Storage & Make ahead
Room Temperature: Store in an airtight container for up to 3 days.
Freezer: Store in an airtight container for up to 2 months. Thaw to room temperature before serving.
Serving: These brownies change texture depending on the temperature they’re served at:
* Warm: gooey, less chewy, messy
* Room temperature: Chewy
* Chilled: Fudgy and firm
Frequently Asked Questions
Can I make Oreo brownies without black cocoa powder?
Yes. Simply omit the black cocoa powder. The brownies will still have plenty of Oreo flavor from the cookies themselves.
Can I use Double Stuf Oreos?
Yes. Double Stuf cookies should work and provide slightly more cream filling flavor.
Can I freeze Oreo brownies?
Yes. Wrap individual slices tightly and freeze for up to 2 months. Thaw before serving.
Can I double this recipe?
Yes. Double all ingredients and bake in a 9×13-inch light-colored metal pan. Increase the bake time anywhere from 1-3 minutes.
What’s the best pan for brownies?
A light-colored metal baking pan produces the most even results. Glass and dark pans can overbake the edges before the center is done. If you struggle with raw, gummy, or sunken centers, try switching to metal. Learn more about glass vs. metal pans here.
These Oreo Brownies are thick, fudgy, chewy, and packed with chopped Oreo cookies. An easy homemade brownie recipe ready in under an hour.
Email This Recipe
Enter your email, and we’ll send it to your inbox.
Cook ModePrevent your screen from going dark
-
Preheat the oven to 325°F. Line an 8 by 8-inch light-colored metal pan** with foil or parchment paper and spray with nonstick cooking spray.
-
In a large microwave-safe bowl, melt the butter. Whisk in the sugar. Allow to cool until just warm, then whisk in the eggs and egg yolk, whisking vigorously for 1 minute. Whisk in the vanilla, oil, and cocoa powders.
-
With a rubber spatula, stir in the flour, cornstarch, and salt until combined. Stir in the chocolate chips and half the Oreo pieces. Spread the brownie batter evenly into the prepared pan. Top with the remaining Oreo pieces, pressing in slightly.
-
Bake for 30-32 minutes, or until the brownies are set and a cake tester inserted into the center has moist crumbs attached. Let cool completely to solidify before cutting and serving.
-
Brownies can be stored in an airtight container at room temperature for up to 3 days. Brownies will be gooey when served warm, chewy when served at room temperature, and fudgy when served chilled.
*Black cocoa intensifies the Oreo flavor. It can most easily be found online. Skip it if you don’t have any.
** I do not recommend using a glass or ceramic pan to bake these brownies. If that’s all you have, increase the baking time anywhere from 5-10 minutes.
More Recipes You’ll Love:
Photos by Joanie Simon.